Official Manual / Quick Start
Import a Subscription and Connect with Shadowrocket
The initial setup has three steps: add existing details, choose a routing mode, and verify access. You do not need to edit a configuration file first or add multiple servers at once.
Add a server or import a subscription
Open Shadowrocket, go to Home, and find Add Server under SERVER. First check what kind of details you have: enter a standalone address, port, and authentication details as a single server; if your service provider supplied a link for retrieving entries, import it as a subscription. Choose one method; you do not need to enter the same details twice for your first connection. Whichever method you use, keep the original protocol and parameters. Do not guess which fields to fill based on a screenshot.
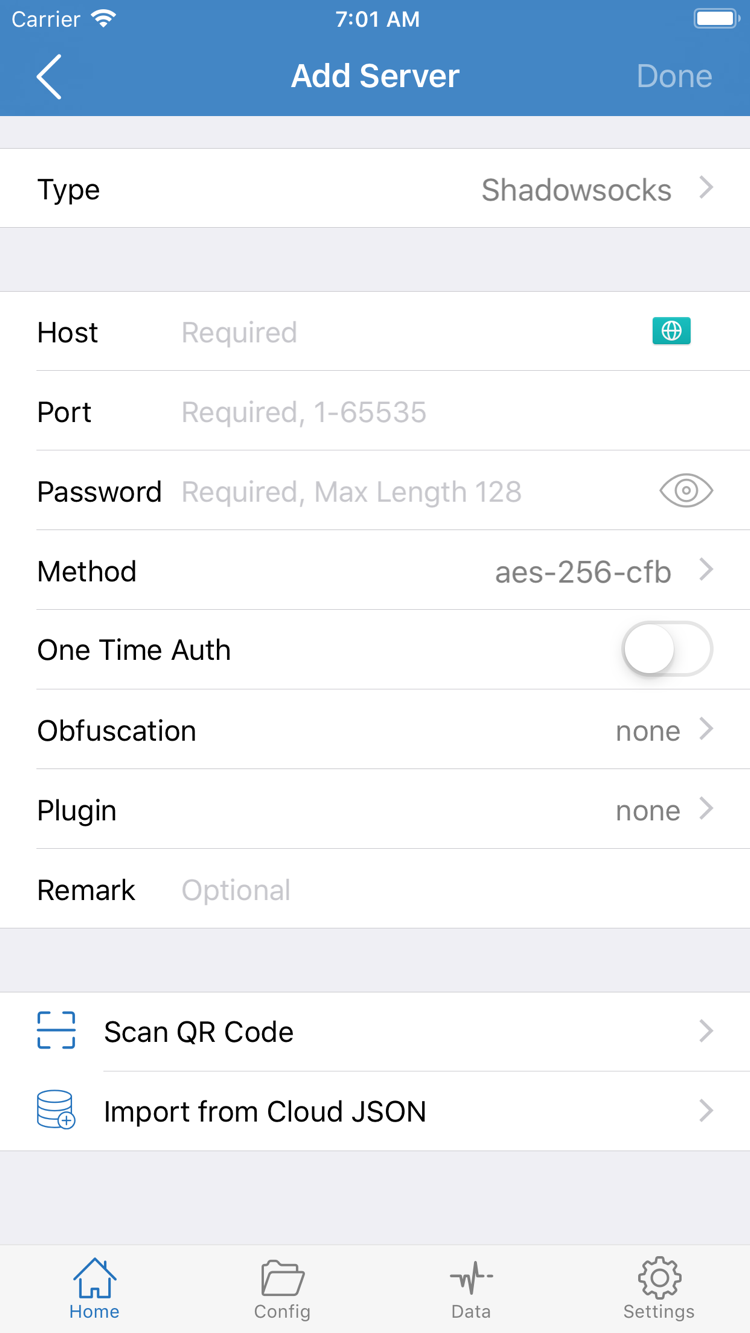
For a single server: select Type first
After opening Add Server, select the protocol specified in your details under Type, such as Shadowsocks or Trojan. The selected protocol determines which fields appear. Usually, enter Host and Port first, then fill in Password, Method, or any other fields required by that protocol. Enter the supplied server address in Host and the separate port number in Port; do not split a complete subscription link between these fields. If you have a QR code for that server, you can also import it with Scan QR Code, then verify the protocol and address. If any details are missing, check with the source of those details instead of trying parameters for another protocol.
For a subscription link: select Subscribe
In Add Server, set Type to Subscribe, paste the complete original subscription link into the link field, and save. The part after the question mark may also be needed to retrieve entries, so do not remove it manually or share the link in public chats or screenshots. Return to Home and wait for selectable entries to appear in the corresponding group. If only the group name appears and it still has no entries when expanded, troubleshoot the subscription loading issue first; do not try to connect to an empty group. Saving only records the details; it does not mean the client is connected. Once an entry is available, continue by choosing a routing mode.
Choose a Global Routing mode
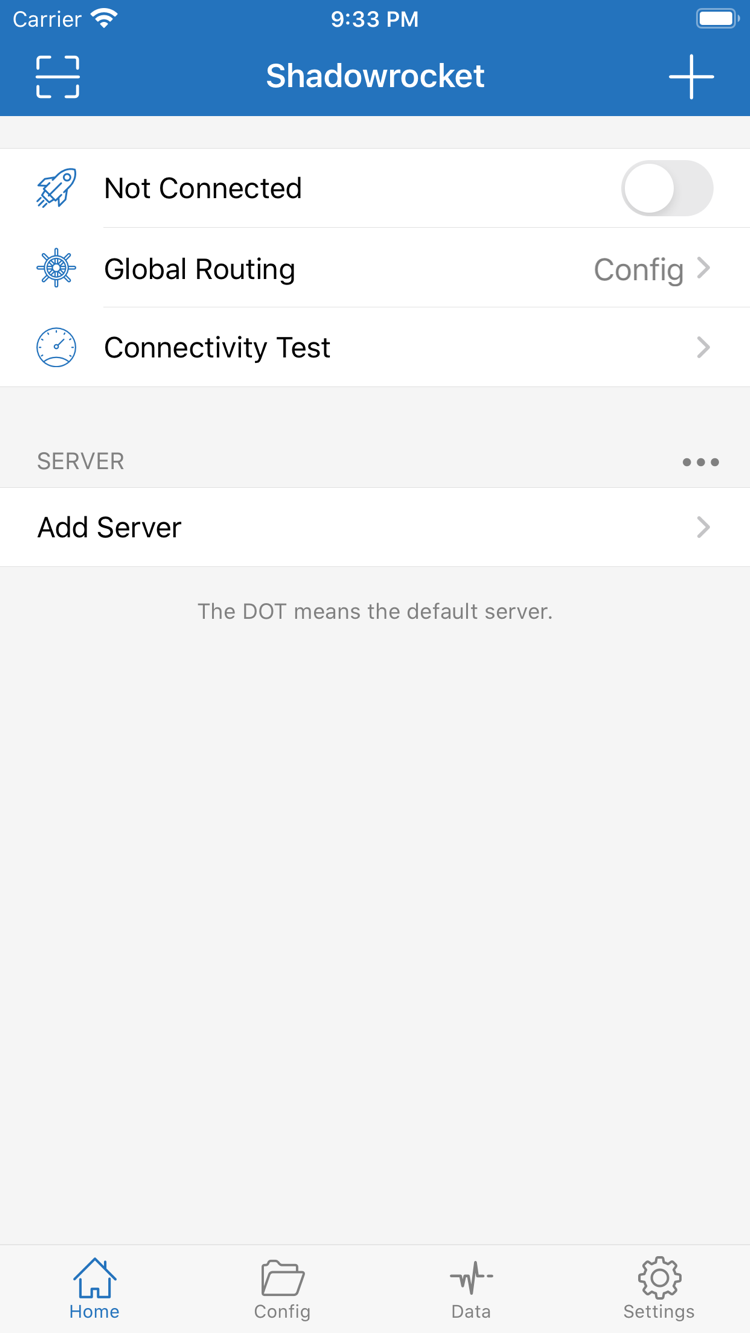
Return to Home and tap Global Routing. This setting determines how the client handles requests; it does not add a server or turn on the connection. If you plan to use rules, choose Config for your first setup. If you only want to compare how a request behaves through a proxy versus direct access, briefly use one of the other modes as a comparison.
- Config: Uses the rules in the current configuration file. Different requests can match PROXY, DIRECT, or REJECT, so turning on the switch does not send every request through the selected server.
- Proxy: Routes requests handled by the client through the proxy path. Use it to compare access results and see whether an issue occurs only with rule-based routing. When the check is complete, switch back to your usual mode.
- Direct: Sends requests handled by the client directly, without a proxy server. This is useful for comparison, but it is different from turning off the switch at the top: selecting Direct does not stop the client connection.
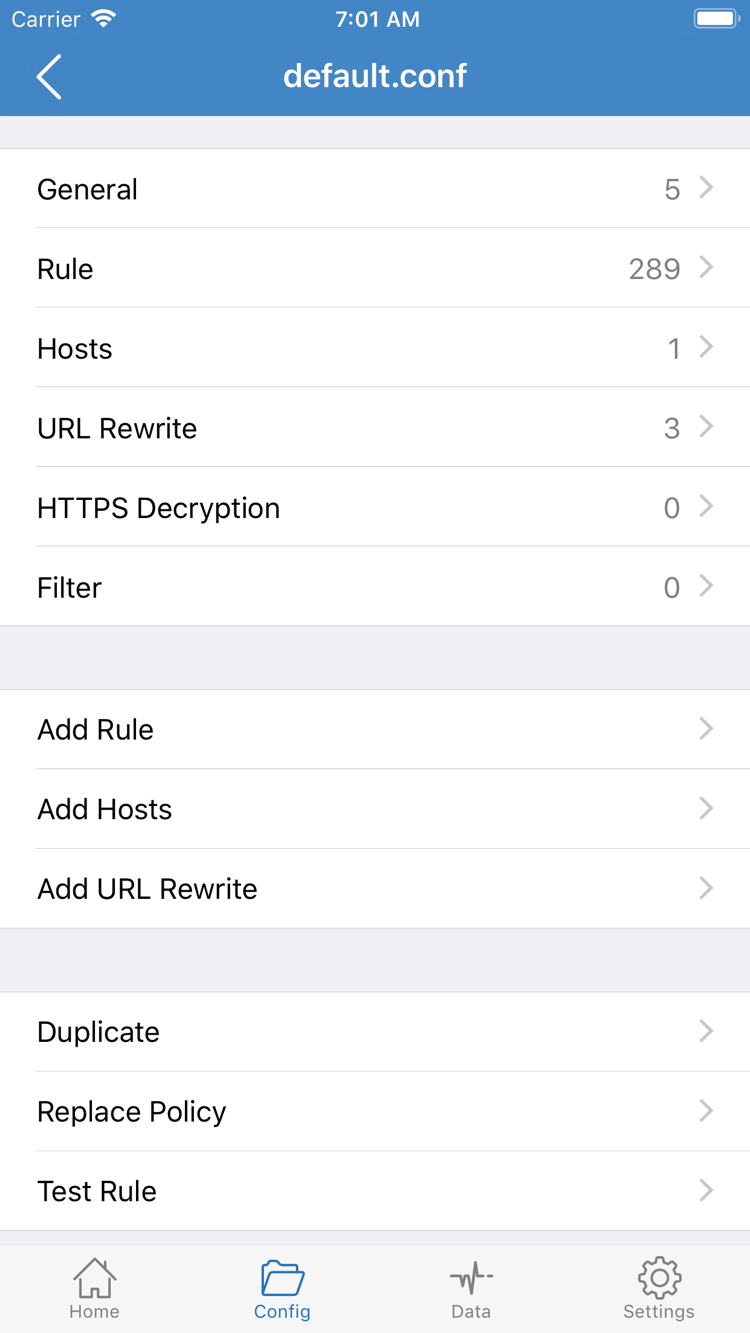
After selecting Config, return to Config and confirm that the expected file is currently enabled. You can open the file to view sections such as General, Rule, Hosts, and URL Rewrite. Add Rule in the image is an entry point for editing rules, not a required step for your first connection. In particular, distinguish the Config mode on Home from the Config page at the bottom: the former applies rules to routing, while the latter is for viewing or managing files. Opening a file on the Config page does not make it the currently enabled file.
If you already have a usable configuration, leave it unchanged for your first connection. Do not clear Rule or change every rule to the same policy just to test one destination, or it will be difficult to tell whether the server, configuration, or destination caused a change. For rule order and FINAL, see the configuration field reference. For now, return to Home and get ready to connect.
Turn on the connection switch in Home
Under SERVER on Home, select the server you just added. If you imported a subscription, expand the corresponding group first and select one of its entries. Check that its name or notes match your details so you do not select an outdated entry by mistake. Then check the current Global Routing mode and make sure it is not set to Direct for comparison only. Now turn on the switch at the top of Home. Selecting a server entry and turning on the connection switch are separate actions; the first alone does not start a connection.
The first time you turn on the switch, the system may ask to add a VPN configuration. Confirm that the prompt was triggered by turning on the switch in Shadowrocket, then allow it as prompted by your device. If the system asks you to verify your identity, use the device's own verification method. When complete, return to Home, wait for the switch to settle, and check that the status is no longer Not Connected. If you accidentally dismissed the prompt, return to Home, check the switch status, and try turning it on once more. If it immediately switches back to disconnected, go to troubleshoot common issues instead of tapping repeatedly.
A connected status confirms only that the device-side connection has started. It does not prove that the selected server can access a particular destination or that a rule has matched. Keep the device on its current Wi-Fi or cellular network; do not change networks while connecting. Leave the server and Global Routing mode unchanged, then check the test result and real-world access separately in the next step.
Verify the connection with a test and real-world access
Tap Connectivity Test on Home and check whether the selected entry returns a test result. Distinguish between two outcomes: a steady switch means the device-side connection has started; a test result means a response was received using the current test method. Whether the result shows a response or a timeout, it reflects only the conditions at that moment and cannot tell you whether every site or app is accessible. Do not replace an entire subscription or configuration based on a single test result.
Next, open a page that you can usually access reliably and for which you know the expected routing mode. Load it again. Do not treat an old page already on screen as a successful result; reload it and confirm that new content is returned. If you expect Config to route the traffic, test one destination expected to use DIRECT and another expected to use PROXY, if possible. Even if both pages open, that confirms access only. To identify the specific rule that matched, check the Rule order in the current file; do not infer the policy solely from whether the page opens.
If a destination fails in Config, you can temporarily switch to Proxy and test the same destination again using the same network and server; switch to Direct for comparison if needed. If only Config fails, check the current configuration file and match order first. If Proxy also fails while Direct works, check the server details and test result first. If all three modes fail, check the basic network connection and whether the destination itself is available. Note which modes succeed or fail, switch back to your intended mode, and use those results in the next step.
Troubleshoot by symptom and test again
The subscription is saved, but SERVER has no entries
First confirm that you selected Subscribe during import. Then check whether the pasted link contains a line break, is missing its final characters, or is actually the service provider's login page address. Return to Home to see whether the group has loaded. If it remains empty, ask the original service provider to confirm that the link is still valid. If a manually added entry appears but will not connect, return to its edit screen and check Type, Host, Port, and authentication parameters. A subscription refresh failure and a single-server connection failure are different issues; reinstalling the client is usually not the first step.
The switch turns off again, or reconnects after you disconnect it manually
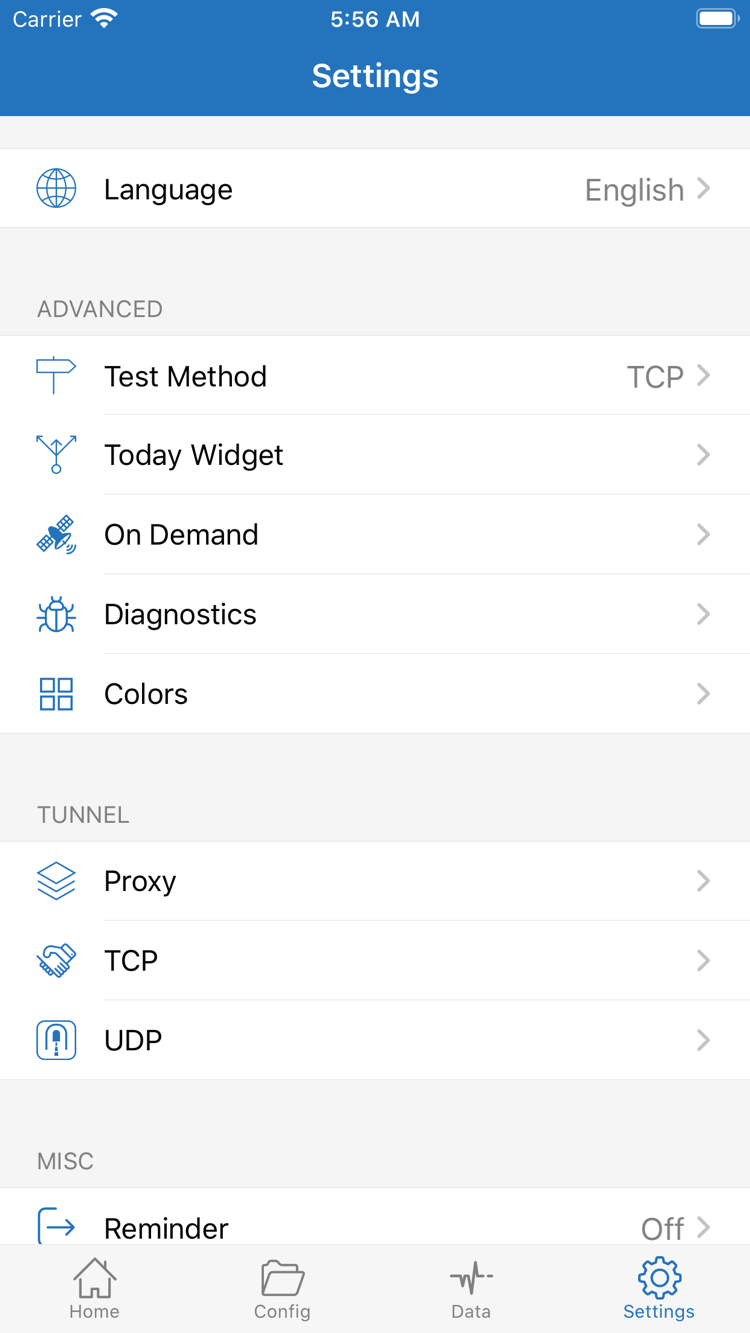
If the switch will not turn on, first check whether you completed the initial VPN configuration prompt, then check whether another VPN connection is running on the system. If the switch turns off but the connection resumes after switching Wi-Fi or cellular networks, check On Demand in Settings. Note the original setting. If your device allows it, temporarily turn off the On Demand setting you configured while testing manually, then restore it after testing. This helps distinguish the result of using the switch manually from a connection triggered by On Demand conditions.
The connection is stable, but access results vary
Use the comparison results from the previous step to narrow down the issue. If only Config fails, start with the currently enabled file and Rule order. If both Connectivity Test and access through Proxy fail, check the selected server and current network. In Settings, check Test Method and note which test method you used so you do not compare results from different test conditions as if they were equivalent. To view diagnostic information, start with Diagnostics. Before sharing screenshots or diagnostic details, hide subscription links and authentication information.
Change one thing at a time, then test again in this order: “check the switch → run a test → reload the same page.” This narrows the issue to one layer—entered details, the device connection, or the access path—even if the problem persists. For further checks on DNS, rules, or other connection issues, see connection troubleshooting. For unfamiliar protocol or setting names, see the glossary.
DOWNLOAD / ALL PLATFORMS